Tracking tag | Developer Center
日本語Use Google Tag Manager
This page describes the steps for tracking user actions (events) using Google Tag Manager.
The tracking tag provides templates and features to be used with Google Tag Manager, provided by Google. We don't support any operations or methods related to Google Tag Manager, other than the templates provided by LY Corporation.
Google Tag Manager
Google Tag Manager is a tag management system that allows you to set up and implement website tags through a web browser. For more details, refer to "About Google Tag Manager."
1. Preparation
Preparing Google Tag Manager
Set up Google Tag Manager after reviewing the "About Google Tag Manager."
Get the tag ID for the tracking tag
Generate the tracking tag from the Campaign Management Tool.
You can check the tag ID in the tracking tag management view after it has been generated.
2. Tag settings
Global snippet setting
Set up the global snippet using Google Tag Manager for all pages of your website.
(1) Open the workspace of the containers (websites) to set tags on Google Tag Manager.
(2) Select "Tags" on the side menu and click "New."
(3) Select "Tag Configuration" and then click "Discover more tag types in the Community Template Gallery".
(4) Select "計測タグ グローバルスニペット" (Tracking tag global snippet) from the list.
(5) Set each item in the setting view for the tracking tag global snippet.
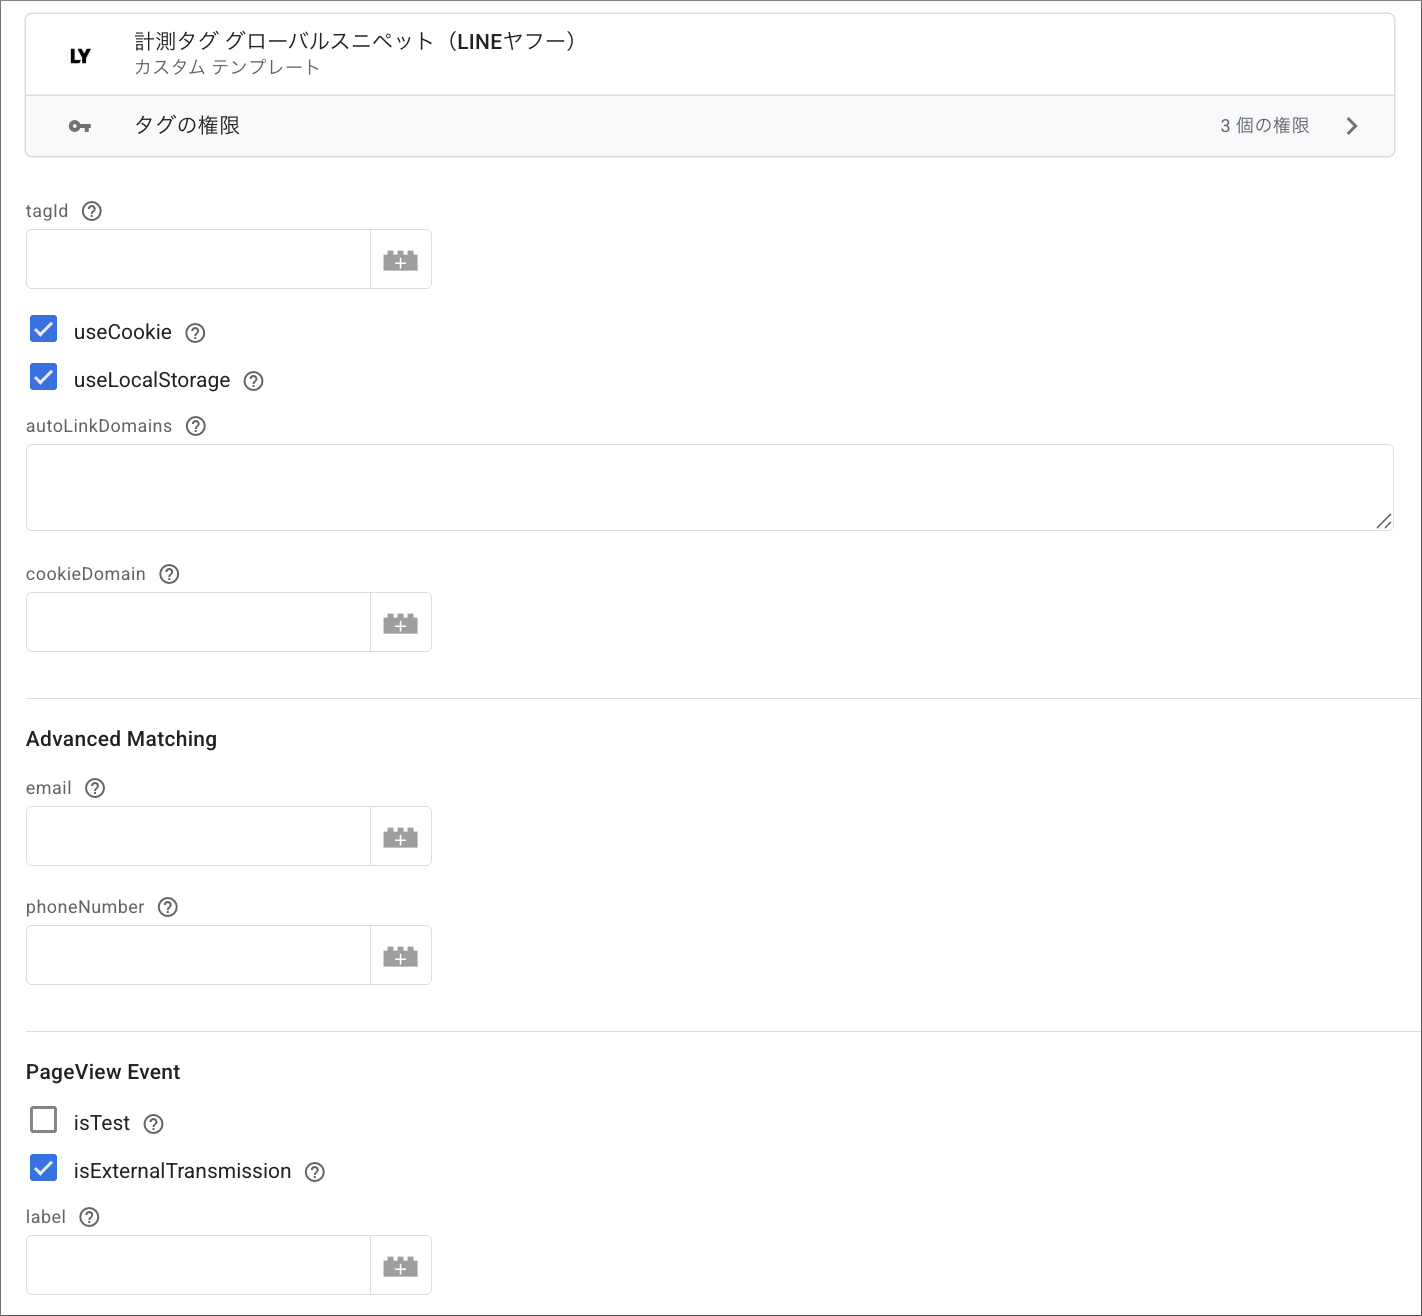
| Section | Item name | Required* | Default value | Settings | Comments |
| - | tagId | Yes | - | Item ID. Get it from the tracking tag management view in the Campaign Management Tool. |
|
| useCookie | true | Select the checkbox if you want to store the identifier in a cookie. | true: selected false: deselected |
||
| useLocalStorage | true | Select the checkbox if you want to store the identifier in local storage. | true: selected false: deselected |
||
| autoLinkDomains | None | These are the domains that use the cross-domain tracking feature (tracking across different domains). Enter one domain per line in the input field. |
|||
| cookieDomain | None | The domain where the cookie will be stored. | |||
| Advanced Matching | None | Email address. | |||
| phoneNumber | None | Phone number. | |||
| PageView Event | isTest | false | Flag indicating whether it is a test. Select the checkbox if you want to exclude from tracking as a test. If the checkbox is not selected, it will be included in tracking as usual. We recommend selecting the checkbox initially. |
true: selected false: deselected |
|
| isExternalTransmission | true | Uncheck the box if you don't want to send website visitor data to partner companies. | true: selected false: deselected |
||
| label | None | This is a custom label set as a filter when creating an audience list. |
(6) Select the conditions under which the tag will be triggered in "Triggers."
(7) Click the "Save."
Event snippet settings
Set the event snippet on pages where you want to measure data for each event.
(1) Open the workspace of the containers for setting tags on Google Tag Manager.
(2) Select "Tags" on the side menu and click "New."
(3) Select "Tag Configuration" and then click "Discover more tag types in the Community Template Gallery".
(4) Select "計測タグ イベントスニペット" (Tracking tag event snippet) from the list.
(5) Set each item in the setting view for the tracking tag event snippet.
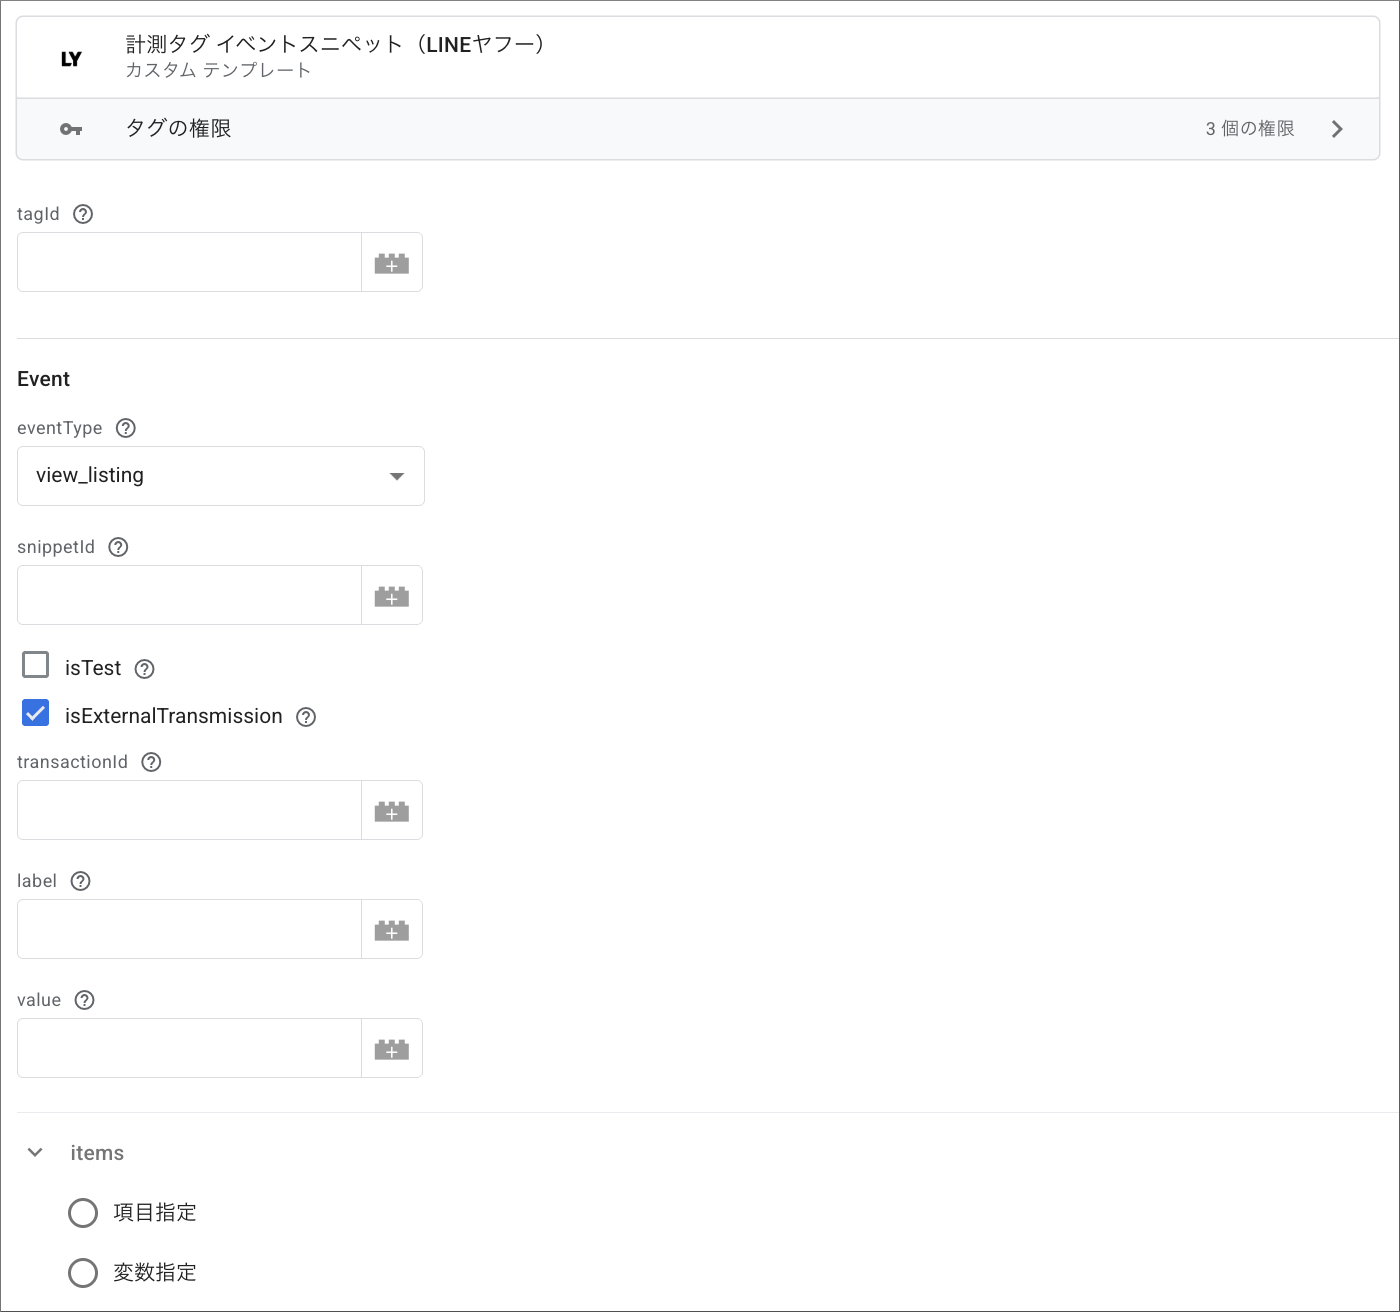
| Section | Parameter name | Parameter name | Required* | Default value | Settings | Comments |
| - | - | tagId | Yes | - | Item ID. Get it from the tracking tag management view in the Campaign Management Tool. |
|
| Event | - | eventType | Yes | - | This is the event type specified in the conversion setting or audience list setting view. | |
| snippetId | None | This is the ID of the event snippet issued in the conversion setting view. This is required when specifying "Event snippet" as a filter. |
||||
| isTest | false | Flag indicating whether it is a test. Select the checkbox if you want to exclude from tracking as a test. If the checkbox is not selected, it will be included in tracking as usual. We recommend selecting the checkbox initially. |
true: selected false: deselected |
|||
| isExternalTransmission | false | Uncheck the box if you don't want to send website visitor data to partner companies. | true: selected false: deselected |
|||
| transactionId | None | The ID used to determine duplication in conversion tracking. You can set it freely according to the advertiser's needs (Example: payment numbers). For deduplication, refer to "Deduplication of event tracking" in the "Parameters." |
||||
| label | None | This is a custom label set as a filter when creating an audience list. | ||||
| value | None | The monetary value of the event. | ||||
| items | In the Google Tag Manager setting view under "Field specifications," you can add the following four items in one line. | |||||
| itemId | None | Item ID. | ・Within 100 characters You can use alphanumeric characters (uppercase and lowercase), hyphens (-), and underscores (_). |
|||
| categoryId | None | Item category ID. | ・Within 50 characters You can use alphanumeric characters (uppercase and lowercase), hyphens (-), and underscores (_). |
|||
| price | None | Item price. | ・Up to 10 digits of half-width numbers ・You can't enter numbers containing decimal points. |
|||
| quantity | Item quantity. | An integer with up to 10 digits of half-width numbers. | ||||
| In the Google Tag Manager setting view under "Variable specification," you can specify array variables. You can specify the object array directly as the value for items. | ||||||
| (items) | None | Enter items as an array. | Example: [ { "itemId": "i1", "categoryId": "", "price": "", "quantity": "" }, { "itemId": "i1", "categoryId": "", "price": "", "quantity": "" } ] |
|||
(6) Select the conditions under which the tag will be triggered in "Triggers."
(7) Click the "Save."
3. Verification
Verify that the tag is functioning as expected in Google Tag Manager or the Campaign Management Tool. If verifying in the Campaign Management Tool, refer to "Check the event history."